Hey, y'all! I'm Cris.
  • Say Hello
  • Check Me Out
  • Work With Me
  • Find Out More
  • Shop My Favorites
  • Home
  • About Me
  • Contact Me
  • Sponsorships
  • Privacy Policy

Kiss My Tulle

Real Life in a Perfectionist World

  • Capsule Wardrobes
    • Fashion
    • Beauty
  • Travel
    • Disney + Marvel
    • Marvel Bounding
  • DIY + Tutorials
    • Home Improvement + Design
    • Food + Cooking
    • Health + Fitness
    • Holidays
  • Pregnancy + Parenting
    • Mommy
    • Daddy
    • First Trimester
    • Second Trimester
    • Third Trimester
    • Baby
    • Toddler
    • Kid
  • Weddings
    • Our $5,000 Wedding
    • Ceremony
    • Reception
    • Honeymoon

DIY + Tutorials, Home + Life · June 10, 2019

Everything You Need To DIY Your Own Wooden Pallet Ceiling Is On Amazon

// I may earn money from the companies mentioned in this post. //

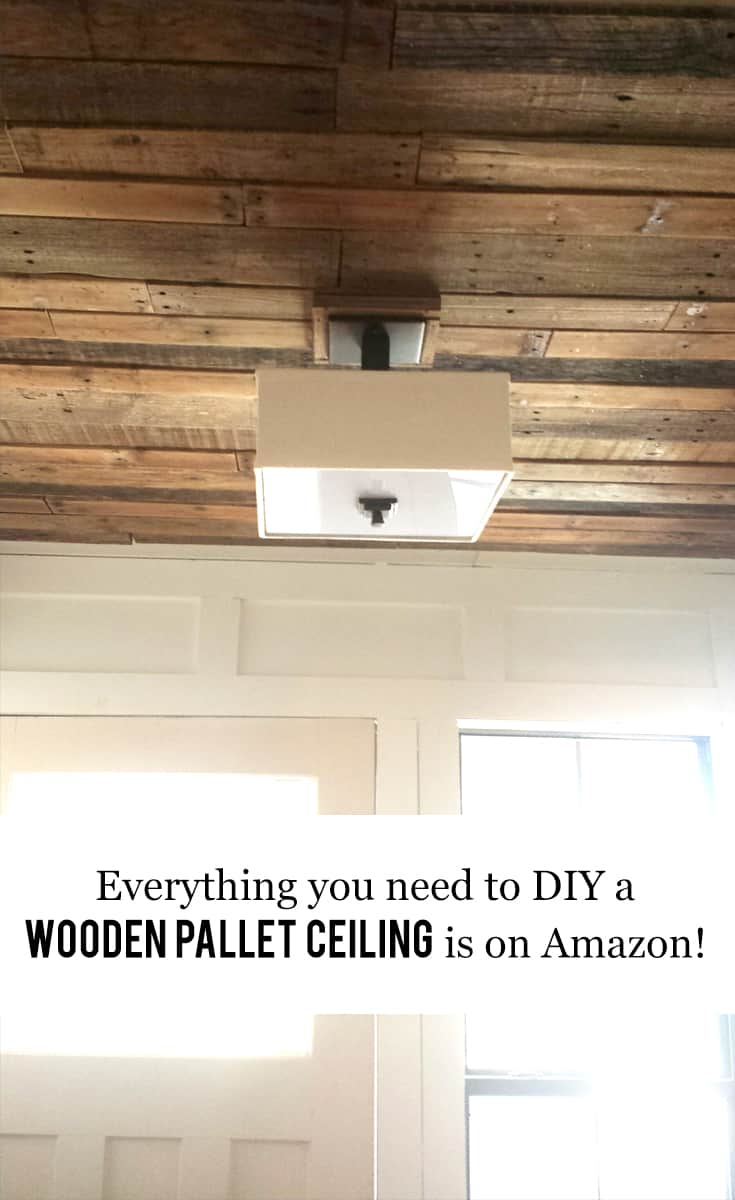
Remember when I wrote that tutorial on how we repurposed the tables built from wooden pallets for our wedding into a cool ceiling treatment for our entryway?

Are you dying to do one of your own?

Everything You Need To DIY Your Own Wooden Pallet Ceiling Is On Amazon

These ceilings are perfect for small rooms with good ventilation – like a powder room, hallway, or entryway.

Try to stick to a room with a ceiling that you can clean (cobwebs and dust do get stuck on this due to the rustic, uneven nature of the medium).

We really love the look of ours and it was SO easy to do (a bit tedious but SO easy). Interested in doing one yourself?

Here's a round up of everything you need to DIY your own wooden pallet ceiling is on Amazon (and don't forget to click through and become an Amazon Prime member with free two day shipping!):

Everything You Need To DIY Your Own Wooden Pallet Ceiling Is On Amazon #homeimprovement #remodel #rustic #farmhouse #fixerupper

Wood Pallets:

Yes, you can even buy the wood pallets on Amazon! These are small and meant for crafts but, they would also work.

Reciprocating Saw:

Also known as a “sawsall”, we used ours to remove the planks of wood from the pallets. It's was much easier just cutting the screws/nails than it was trying to remove them using a hammer or a drill.

Pliers:

We used a pair to pull the leftover cut pieces of nail/screw from the wooden planks. You could use your hands but pliers are easier, in my opinion.

Orbital Sander:

I have this cordless version and LOVE it. Be sure to pick up a battery (it doesn't come with one). I find that, on this project, a cordless sander is much easier to use than sandpaper or a corded version.

Stain:

If you don't like the color of your pallets or just want a more uniform look, pick up some stain and apply it after you sand them but before the polyurethane. Use a traditional version or an eco-friendly one.

Polyurethane:

Use this to finish off the wooden planks before attaching the to the ceiling. Look, ceilings get dirty but you're less likely to clean them so just apply a coat or two of polyurethane and make your peace.

Rags:

Used to apply the polyurethane and/or the stain.

Latex Gloves:

I always wear latex gloves while applying polyurethane or stain to protect my skin.

Multi Tool With Saw:

This was used to cut out the hole for the light fixture. This is the one we use and it's a great tool to have for small projects like this.

Finishing Nail Gun:

This is used to attach the wooden planks to the ceiling. I have this cordless version and it's one of the best tool that I've ever invested in. Not having to hook up to an air compressor and mess with a huge hose and power cord is awesome.

Everything You Need To DIY Your Own Wooden Pallet Ceiling Is On Amazon #homeimprovement #remodel #rustic #farmhouse #fixerupper

Loving the look of a rustic farmhouse focal point in your house?

Learn how to style it here and be sure to share your finished project with me on Instagram.

Sharing is caring!

  • Share
  • Email
  • Print

Posted In: DIY + Tutorials, Home + Life · Tagged: Amazon, DIY, Handmade, home, home improvement, lodge

You’ll Also Love

Create a Buffet: DIY Catering Ideas for Your Wedding Reception
Create a Pretty DIY Fabric Streamer Wedding Ceremony Backdrop
Ornament Gift Tag DIY Featuring The #CricutMaker #AD #CricutMade #CricutHoliday @Cricut #Christmas #gift #holiday #givingCreate Custom Gift Tags with Cricut Maker: DIY Ornament Tutorial

Leave a Reply Cancel reply

Your email address will not be published. Required fields are marked *

Recipe Rating


This site uses Akismet to reduce spam. Learn how your comment data is processed.

Next Post >

My Labor and Delivery Must Haves

I'm Cris. I live in Alaska with my husband, two kids, and two cats. I love sleeping, Disney, Marvel, and fries.

Kiss My Tulle is a participant in the Amazon Services LLC Associates Program, an affiliate advertising program designed to provide a means for sites to earn advertising fees by advertising and linking to Amazon.com.

Web Stories

Work With Me

  • Sponsorships
  • Contact Me
  • Find Out More
  • Press
  • Privacy Policy

Shop My Favorites

  • Travel Essentials
  • Capsule Wardrobes
  • Home Decor Finds
  • Pregnancy Must Haves
  • DIY Tools

hey, y'all!

I'm Cris. Kiss My Tulle is filled with humor, down-to-earth advice, true parenting stories that are equal parts funny and horrifying, and some swearing while tackling real life in a perfectionist world. Stick around!

Disney + Travel

  • Travel
  • Disney + Marvel
  • Marvel Bounding
  • Honeymoon

Being A Mom

  • DIY + Tutorials
  • Pregnancy + Parenting
  • Capsule Wardrobes
  • Food + Cooking
  • Home + Life
  • Home
  • About Me
  • Contact Me
  • Sponsorships
  • Privacy Policy

Copyright © 2025 Kiss My Tulle · Theme by 17th Avenue