
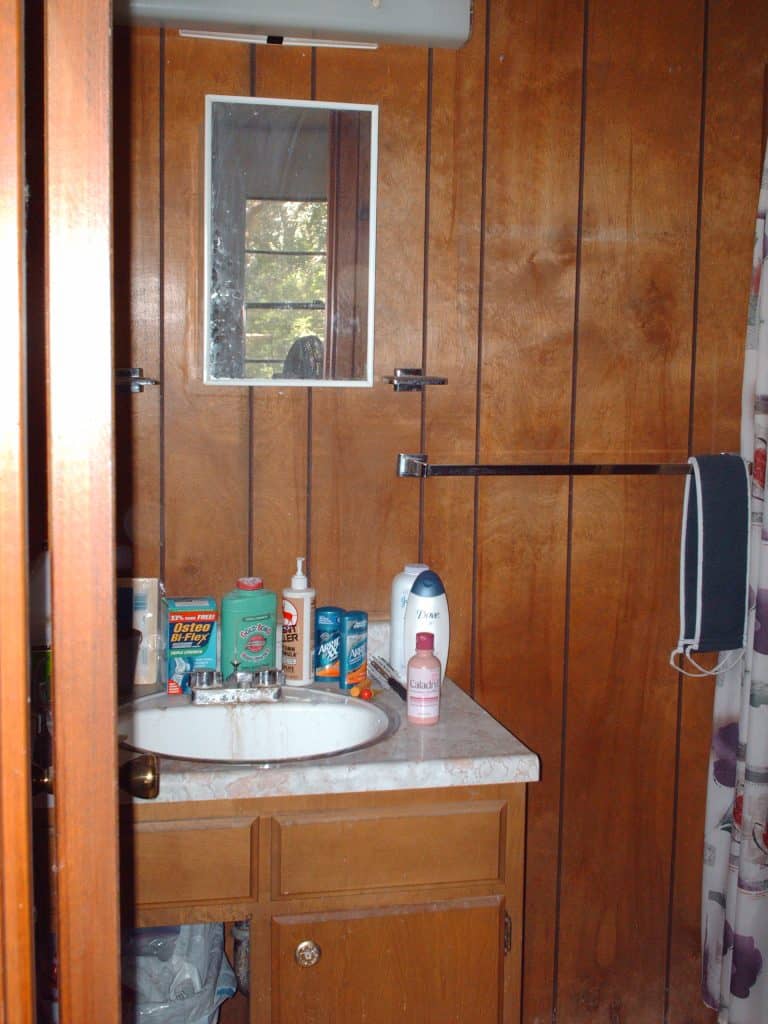
We’re baaack! The last couple of weeks have been crazy around Casa de Crap but we’re really buckling down now and getting all the boring structural stuff done on Le Master Bathroom. Next, we be tackling the walls. Remember, originally the room had floor to ceiling wood paneling – as seen here (those of you with sensitive stomachs may want to look away…):
So, during the demo – down came the walls to reveal…

Nothin’. That’s right – there was NOTHING behind the walls. No drywall, no insulation, just empty space. No wonder we can hear everything that happens in there (no fun in any bathroom ever) and NO WONDER our house is so freaking hot in the summer and cold in the winter.
Also, during our inside-the-wall-scavenger-hunt, we discovered just how poorly our home was built. The wall were all created with these weird grooves all over them – which the builders would then line up in a certain order and use to insert crossbeams for support (instead of just supporting the damn things properly to begin with)! Losers. AND none of the wood was straight. So all over all our walls are these long, slim slats of wood that are stapled on to the wood framing and act as shims.
I HATE THE ORIGINAL OWNERS AND BUILDERS OF THIS HOUSE.
Ahem. Thank you for seeing me through that bit of venting. Anyhoo, on to the remodeling!
The first thing that we did is decided where everything was going to go. It was decided that due to the bathroom’s small size and weird window/door placement (plus, remember that this isn’t our forever home so we’re trying not to spend loads of money on making everything perfectly perfect) – it would be best if we left all the plumbing where it was. However, one thing that we did do was extend the shower piping up about 2’. It was so low originally that I (at a whopping 5’4”) couldn’t stand directly underneath it and wash my hair. So, a good friend (and plumber) volunteered to solder a new section of copper pipe into the old shower head. Done and done.
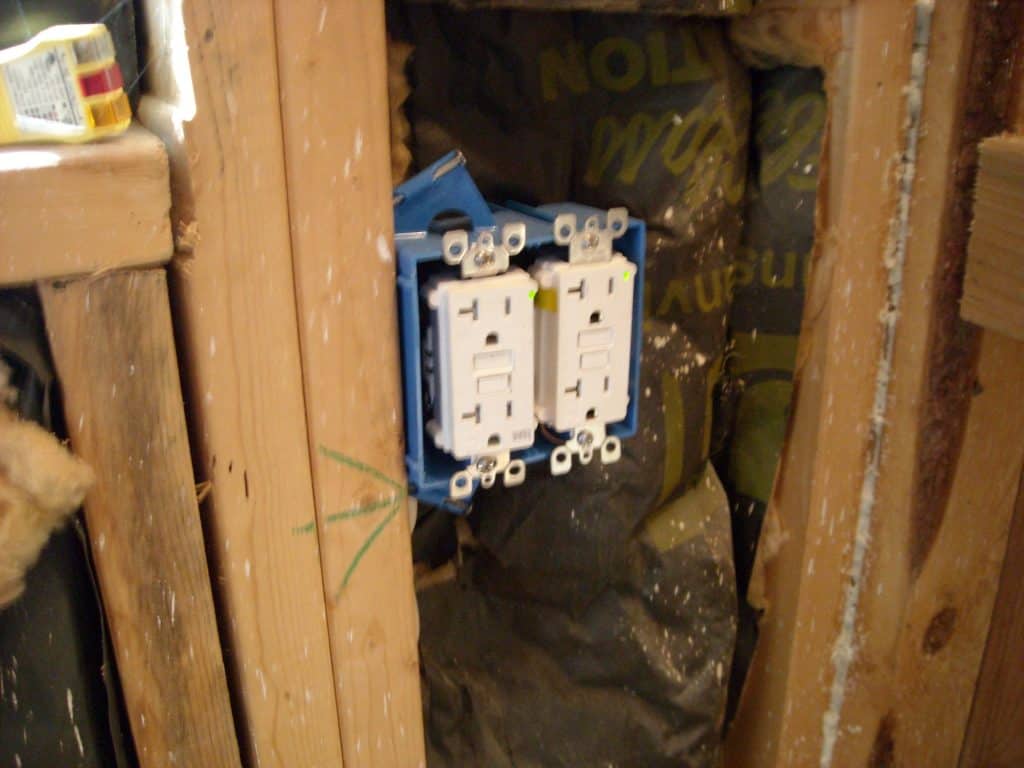
The next step was to switch out the outlets and light switches for white ones that were up to code (GFCIs). Luckily, in real life, The Boy is an electrician so job was entirely his and only took a few moments. For those of you not married to an electrician, here’s a good tutorial on wiring a GFCI yourself.
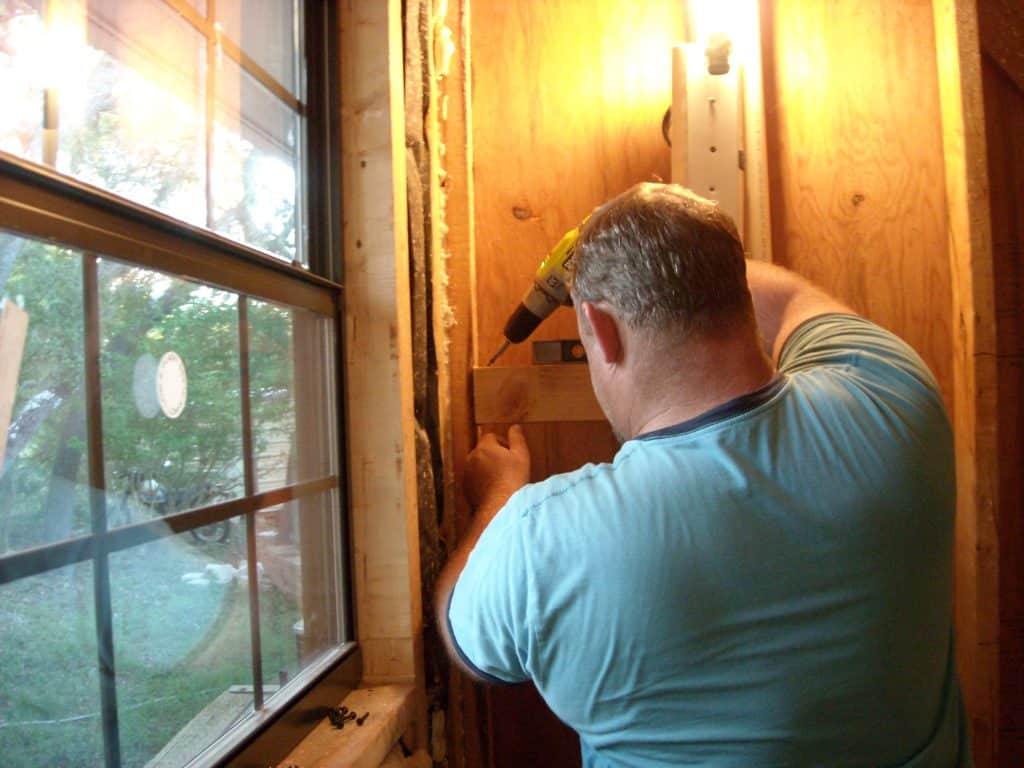
After the electrical issues, we did one of the smartest things ever. We figured out exactly where our wall mounted fixtures were going to go and put pieces of wood in those spots. See, I grew up in a house where towel bars were constantly falling out of the wall and leaving a giant hole. Not so in my house thankyouverymuch. Here’s how our inner wall hanging support thingers looked (*be sure to measure and write down where you put them so that you can hang everything in those spots):

Next, the same plumber friend who did our showerhead pipe offered us some leftover insulation from a project he did at his house. And as luck would have it… it was exactly the right amount needed to insulate our Master Bathroom walls (can I get an “Amen!” for not hearing what’s happening in the loo!). Then we used those bottles of spray foam to insulate/fill in all the framing nooks and crannies (this was to help insulate and stop bug invasions). After that little project was done, The Boy and I hung the moisture-resistant dry wall.


Dry wall is one of those jobs that look so easy but is actually a total bitch. If you are in a relationship and remodeling together – I guarantee that this is the job that will cause fighting. Dry wall sucks. Lucky for us, we were planning on covering our walls in floor-to-ceiling beadboard so we didn’t get the pleasure of fighting over the mudding and taping portion. We just fought about the cutting and hanging portion. Ugh, but it’s done now and we still wanted to marry each other.
Next up? Hanging the beadboard and painting everything. I know, you can hardly stand yourselves. So tell me y’all – do your walls have insulation? Have you dry walled together? Are both of you still alive to talk about it? Fire away in the comments!


Leave a Reply